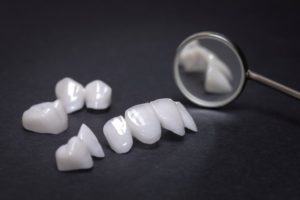
Do you have stained, chipped, cracked, or misshaped teeth? These are some of the dental imperfections that veneers can fix so you can have the smile you have always wanted! Veneers are thin sheaths of dental-grade porcelain that are placed over the front-facing surfaces of your teeth. They are completely life-like and can completely transform your pearly whites! Read on to learn about the step-by-step process of getting veneers.
Step #1: Initial Consultation
The process begins with a consultation with your dentist. This is necessary so they can understand your dental goals. You should discuss the problems you want to address as well as the type of smile you would like to have. Everyone’s ideal is different, so it’s a good idea to bring some visual examples of how you want your teeth to look. Your dentist will give you a thorough examination and determine if veneers are the right treatment for you. If so, you both can begin the planning process and start working towards your dream look.
Step #2: Teeth Preparation
Once a personalized plan has been made, your teeth will be prepared for the new veneers. The preparation process will vary depending on each case. It can involve polishing the teeth or removing a thin layer of enamel from the front, biting edges, or sides. The overall goal is to remove as little tooth structure as possible, but the amount depends on the desired result. It’s crucial to discuss preparation before it begins, as this step of the process is not reversible.
Step #3: Temporary Veneers
As you wait for your permanent upgrade, you will wear temporary veneers. While not as durable as the final ones, they will look like a close replica of your final smile in terms of shape, length, and alignment. Adjustments can even be made to perfect your final look even more. On average, you will only wear your temporary veneers for a few weeks.
Step #4: Laboratory Creation
After your teeth are prepared and temporary veneers are placed, your dentist will make the final impressions of your prepared teeth and send them to the dental laboratory. The technicians will use them to create a replica of your teeth to make your permanent veneers.
Step #5: Sealing the Deal
When your permanent veneers arrive from the lab, you will return to your dentist’s office, and they will be bonded to your teeth with a special bonding agent. They’ll be attached so securely that you won’t have to worry about them coming off accidentally. Now it’s time to enjoy your new, radiant grin!
Veneers are an excellent option to get your dream smile. Now that you know the process, you can begin the steps to turn that dream into a reality. You will find it will be worth every step!
About the Author
Dr. Kevin Labosky is passionate about providing high-quality service so your smile can be as healthy and beautiful as possible! With over 25 years of experience, he completes extensive continuing education each year, including courses from the prestigious Dawson Academy. He is highly experienced in restorative and cosmetic dentistry and can successfully transform your teeth with veneers. To schedule a consultation, contact him through his website or call (814) 237-7004.


